**Comforting Homemade Peppermint Marshmallows for Hot Cocoa**
**Introduction**
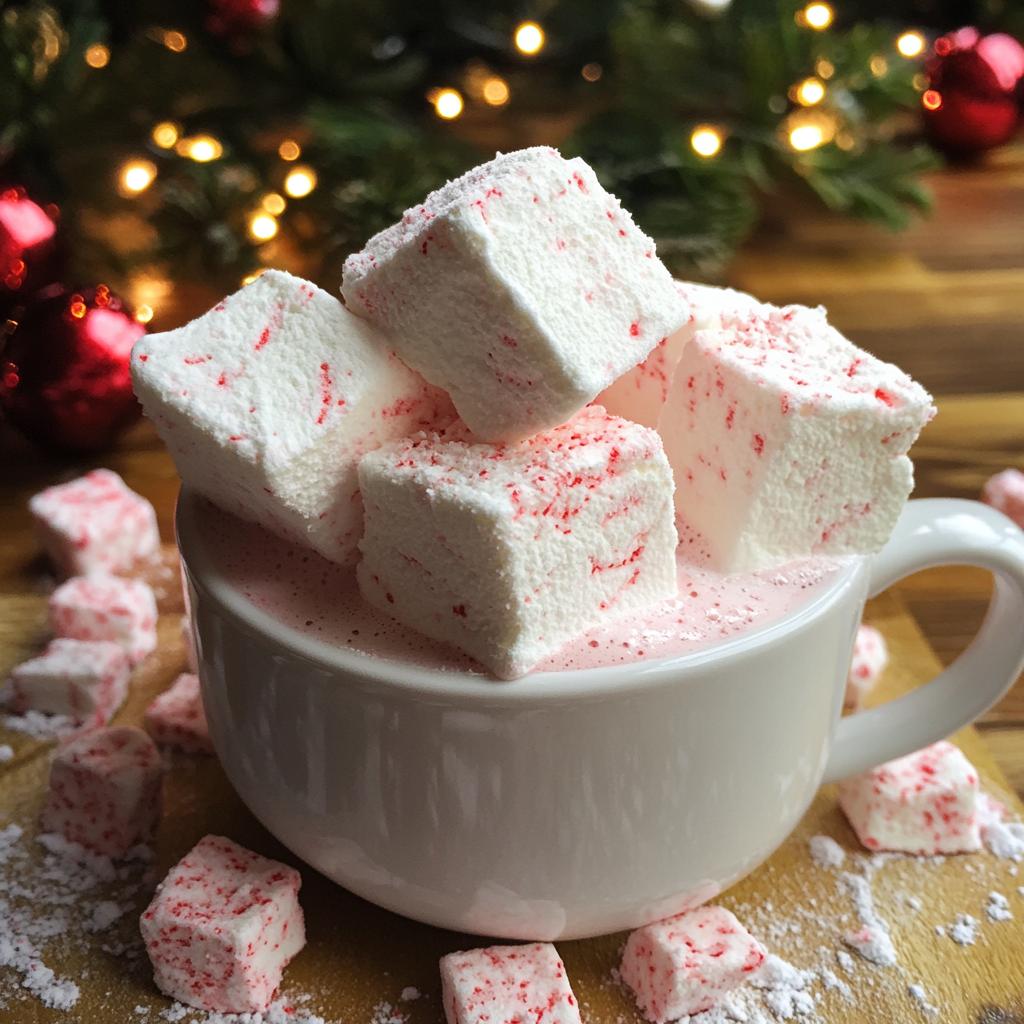
Elevate your hot cocoa game this cold season with our homemade peppermint marshmallows recipe! These delectable treats are fluffy, indulgent and exude deliciously minty vibes. They’re perfect for dropping into a steaming mug of cocoa, creating a delightful contrast in both temperature and texture.
**Why Make This Recipe**
Making your own peppermint marshmallows presents a number of advantages:
1. They’re hands-down tastier than store-bought versions – expect a light, airy texture and a minty fresh flavor that complements your hot cocoa beautifully.
2. It’s a fun and rewarding DIY kitchen project.
3. You get to avoid unnecessary additives often found in commercial brands.
4. Lastly, homemade marshmallows make a charming and unique gift during the holiday season.
**How to Make Homemade Peppermint Marshmallows for Hot Cocoa**
**Ingredients:**
Here’s what you’ll need:
* 3 packages unflavored gelatin
* 1 cup cold water, divided
* 1 1/2 cups granulated sugar
* 1 cup light corn syrup
* 1/4 tsp salt
* 1 tsp peppermint extract
* Red food coloring (optional, for swirling)
* Powdered sugar, for dusting
**Directions:**
1. Begin by combining the unflavored gelatin with 1/2 cup of cold water in a stand mixer. Let this sit while you proceed with the syrup.
2. Now, onto the syrup. Combine the remaining 1/2 cup of water, granulated sugar, corn syrup, and salt in a saucepan over medium heat. Bring the mixture to a boil, stirring occasionally, until the sugar has dissolved.
3. Turn the heat up high and allow the mixture to boil, not stirring, until a candy thermometer indicates a temperature of 240°F. This should take about 8 minutes.
4. Very carefully, pour the hot syrup into your gelatin mixture, whisking on low speed. Increase the speed to high and beat the mixture until it becomes fluffy and thick. This will take about 10 to 12 minutes. In the final minute, mix in the peppermint extract.
5. For a festive touch, gently fold a few drops of red food coloring into the mixture, creating fabulous peppermint swirls.
6. Pour the marshmallow mixture into a 9×13-inch pan that has been greased. Dust the top of the mixture with powdered sugar and let sit uncovered for a minimum of 4 hours.
7. Finally, use a knife (dusted with powdered sugar to prevent sticking) to cut the set marshmallow into squares.
**How to Serve Homemade Peppermint Marshmallows**
These delightful marshmallows are best served in a warm cup of hot cocoa. For added luxury, sprinkle some grated chocolate on top. They can also be enjoyed on their own or included in a DIY hot cocoa kit as a wonderful holiday gift.
**How to Store Homemade Peppermint Marshmallows**
Store your homemade peppermint marshmallows in a cool, dry place within an airtight container. Layer them with parchment paper to avoid them sticking together.
**Tips to Make Homemade Peppermint Marshmallows**
Using a stand mixer will make the process much easier, as the gelatin and syrup require a fair amount of whipping.
**Variation**
If peppermint is not your thing, swap the peppermint extract for vanilla or almond. You can also experiment with different food coloring for an extra pop of color.
**FAQs**
1. **Can I use a hand mixer if I don’t have a stand mixer?**
Yes, but it might take longer to achieve the right consistency.
2. **What if I don’t have a candy thermometer?**
You can check if the sugar syrup has reached the “soft-ball stage.” Drop some syrup into cold water, if it forms a soft, flexible ball, it’s ready.
3. **Can I freeze the marshmallows for longer storage?**
Freezing is not recommended as it may change the marshmallow’s texture when defrosted.
So let’s say goodbye to store-bought marshmallows as we know it, and hello to our homemade Peppermint Marshmallows! Enjoy your crafting and sipping!